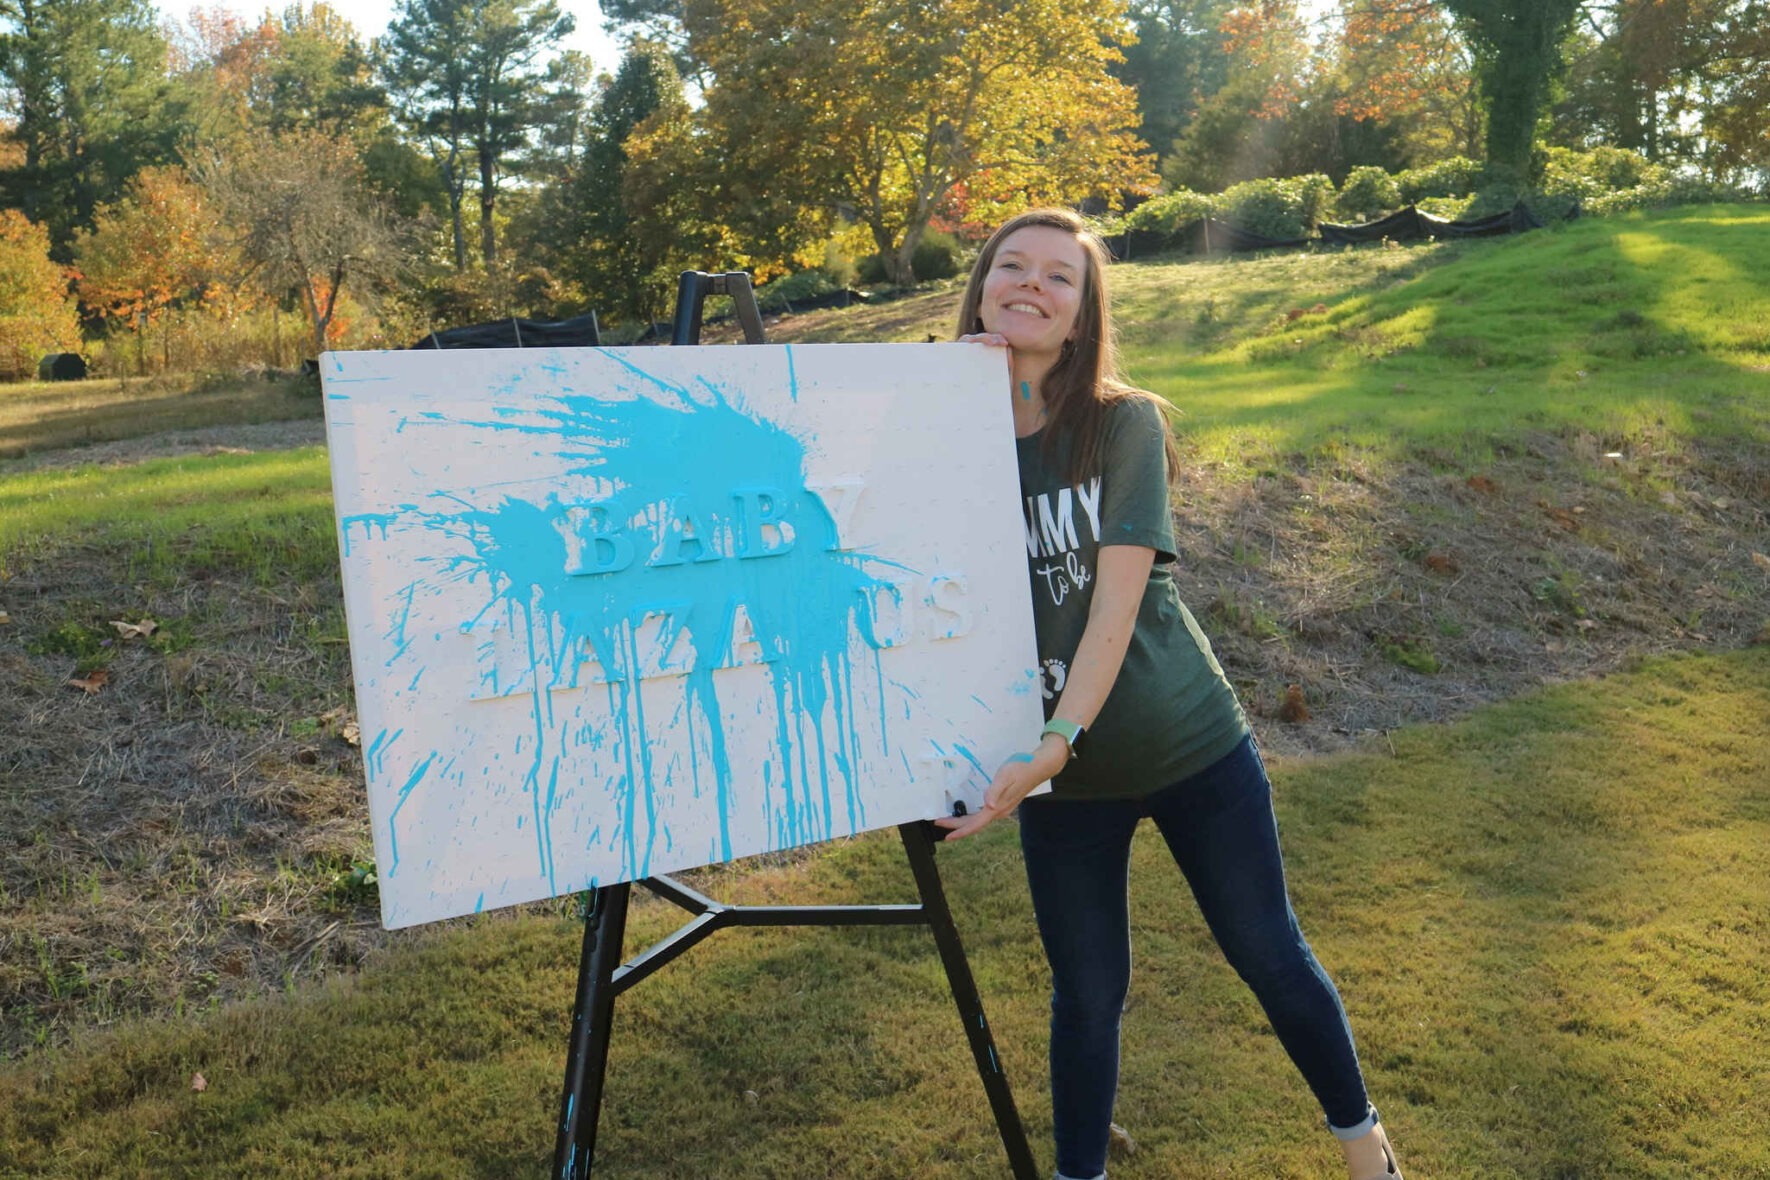

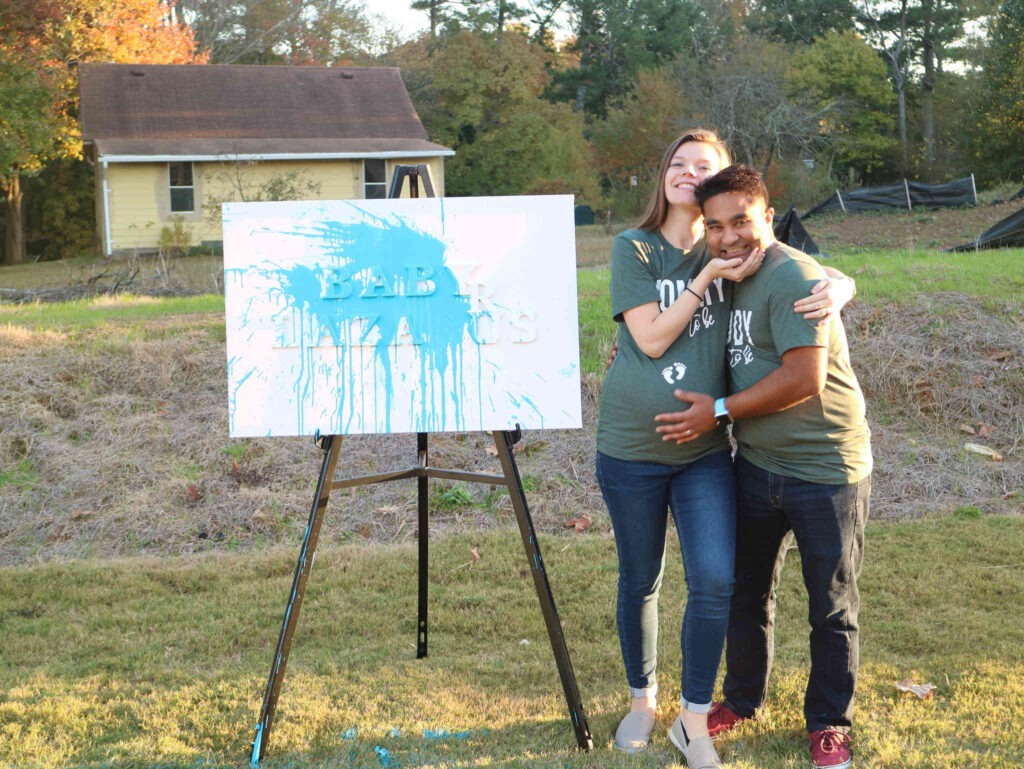
There are plenty of gender reveal ideas out there, but when we were planning our party, none were hitting home with us. I wanted to have a keepsake of the day so I started searching online for gender reveal ideas. We wanted something memorable (and safe!) but we couldn’t find anything we agreed on. Taking some inspiration from a couple of different sources I came up with our gender reveal splatter canvas!
Tips and Tricks
This is a simple project and I’ve worked out the kinks already! Here’s what I learned from my experience:
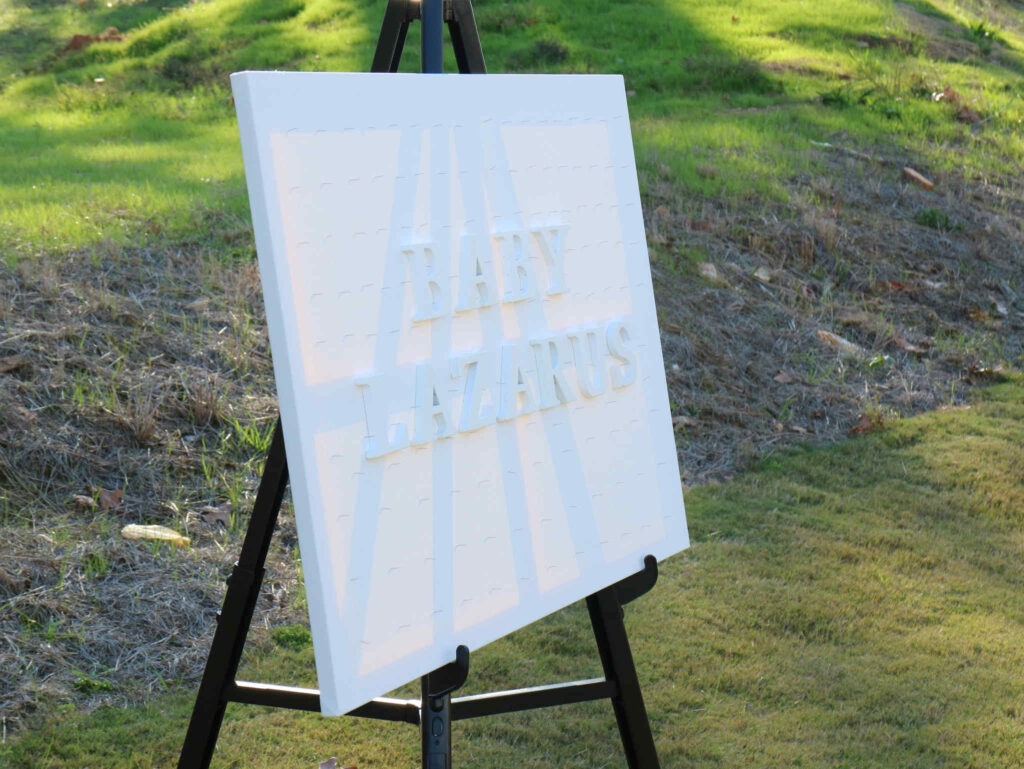
- The more pins you use, the better! The balloons will pop on impact with the pins so it’s best to cover the canvas as much as possible. If the balloon hits plain canvas it will most likely not pop. Don’t worry about the pins leaving holes in the canvas since they are quite thin.
- For the person who is filling the paint balloons: wear gloves and an expendable layer of outer clothes! Messes are bound to happen and if the new mom and dad spot paint smudges on you before the reveal then the surprise will be ruined. Keep nail polish remover on hand to clean up any spots on you and on the outside of the balloons
- Go heavy-handed with the fabric glue to be sure the letters are firmly attached to the canvas. This will keep the letters from being knocked off by the balloons.
- We prepared six balloons and burst all of them on the gender reveal canvas – you can do more or less depending on how you want the final product to look. You can also use different shades of the same color (for example, light blue and dark blue paint) for a different look
Materials:
- Easel
- Glue
- Brand of balloons
- Paint
- Letters
- Push pins
- Canvas
- Finger nail polish remover
- Athletic/sports water bottle with nozzle
Instructions for Gender Reveal Canvas:
- Use a measuring tape to be sure the letters are centered and lay them out before glueing to be sure you are happy with the design.
- Using fabric glue, adhere letters onto the canvas.
- Push pins through the back of the canvas so that the pointed end comes out on the lettered side. Place these close together (about 1” apart) over the entire canvas, including in between the letters.
- Have a designated person who knows the gender be tasked with filling the balloons with paint. I would recommend this person wears gloves and even an old sweatshirt which can get paint on it because this part can be messy!
- Fill the water bottle with paint and attach a balloon to the spout. Tipping the bottle and balloon upside down, squeeze the bottle so that the balloon is filled with paint. Carefully remove the balloon from the spout and tie it off.
- Use your fingernail polish remover to clean up your hands and the outsides of the balloons of any stray paint (so that the new parents aren’t tipped off before the big splash!)
- Set up the prepared canvas on your easel on level ground
- Use string to attach the wooden supports of the canvas to the easel for added sturdiness.
- Throw your balloons! We stood about six feet away which felt comfortable for us and kept us mostly out of the splash zone
- Remove the pins from the canvas before the paint dries. This helps prevent visible holes in the fabric
- Allow the canvas to dry overnight and then hang it up inside!
Visit our Family article section for more content on family and kids!